How to Make a Recycled DIY Guitar
By: Christine Van Zandt
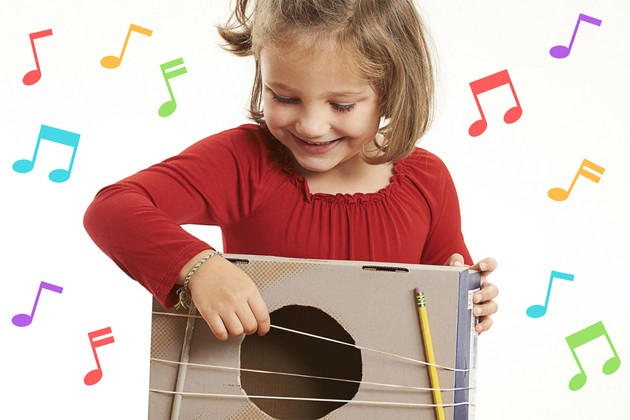
Upcycle an empty shoebox and watch your little one explore making music with her very own homemade diy guitar! This classic guitar toy craft is a fun, hands-on way to get your child moving and grooving, while helping her understand how sound is produced. Learn how to make instruments with recycled materials here!
What You'll Need
What to Do
-
Cut a circle out of the top of the shoebox.
-
Stretch the rubber bands and place them around the box lengthwise, positioned over the hole.
-
Insert the pencils horizontally under the rubber bands, one on each side of the circle.
-
Pluck the rubber bands to make music.
Extend the Fun
Younger kids: Do you have scraps from previous crafts that you don’t know what to do with? Have your child personalize her guitar with construction paper, markers, and any other miscellaneous extras you want to use up!
Older kids: Enhance the pretend-play guitar to be more like a real-life instrument by adding a neck. Recycle an empty paper towel tube and attach it to the end of the shoe box. If you want to take this one step further, your child can create tuning pegs by gluing two popsicle sticks onto the paper towel roll near the end. The popsicle sticks should be about one inch apart and glued perpendicular to the paper towel roll. Explain to your child how string instruments make sound. When you press your fingers down on the strings, the pressure changes the strings’ length, and this results in vibrations at different frequencies. Shortening a string makes it sound higher pitched, and varying string thickness also produces different sounds. Test this out by using rubber bands with varying thicknesses.


